http://www.etsy.com/shop/Dblcrafty
What do you guys think?
Wednesday, August 25, 2010
Friday, May 14, 2010
Work at home
I work as a ChaCha Guide and they are recruiting for new Guides. ChaCha has answered over half a billion questions for people on the go, all for free. And, ChaCha.com is in the Top 100 Most Visited Websites in the U.S. You can earn some extra cash by answering questions about things you are interested in! Enter my email address batempleman@live in the referral box at http://becomeaguide.chacha.com.
Saturday, April 17, 2010
Monday, March 8, 2010


Pillow Case Tote
I am going to show you how to turn that old pillow case into a fashionable tote.
You will need:
Pillow case
T-Shirt (fabric for lining & strap)
Sewing machine (or needle and thread)
First cut the top off your pillow case so you have the basic size of your tote.


You will need:
Pillow case
T-Shirt (fabric for lining & strap)
Sewing machine (or needle and thread)
First cut the top off your pillow case so you have the basic size of your tote.

(Before Trimming to size)

(After trimming to size)
Then you will cut second fabric to same size (as in with my other tote tutorial)
Then sew in lining

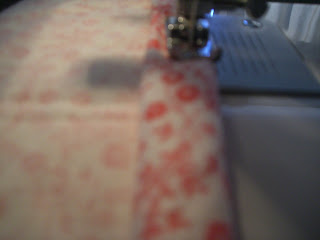
Braid left over pillow case fabric with new fabric for the strap (To desired length) Sew the ends secure so it will not come apart.

Then sew each side of braids to the tote. (If you are more of a perfectionist you can sew braids on before adding the lining so it is hidden.)

Your finished product should look something like this:

Thank you for looking!!
Thursday, February 25, 2010
Crayon craft for the kids
This tutorial will show you how to make crayons out of old half used crayons or new cheap crayons to make bigger ones for little hands.
You Will need:
Crayons
Muffin Tray
Non Stick cooking spray
First you will need to peel off all the paper of the crayons.
Break up the crayons into little pieces and put them into the greased muffin pan

Then decide how you want your colors. (I did mostly all reds, pinks and purples and such together to help my son learn his colors)

Bake at 275 for about 10 min. Time may vary. (They melt fairly quickly)

When melted take them out and let them cool. If it is cold out side I suggest you put them outside or in the freezer. They will take about another 10 min to cool all the way.
 When cooled they should pop out of the pan fairly easy. But if not i put a rag over the back and hit it with a butter knife (did not harm the pan) and they all fell out. Thank you! Let me know what you think!
You Will need:
Crayons
Muffin Tray
Non Stick cooking spray
First you will need to peel off all the paper of the crayons.
Break up the crayons into little pieces and put them into the greased muffin pan

Then decide how you want your colors. (I did mostly all reds, pinks and purples and such together to help my son learn his colors)

Bake at 275 for about 10 min. Time may vary. (They melt fairly quickly)

When melted take them out and let them cool. If it is cold out side I suggest you put them outside or in the freezer. They will take about another 10 min to cool all the way.

Wednesday, February 24, 2010
Finished Waste basket
I finished my wastebasket last week but my computer was down, sorry it took so long to get the pic's posted but here it is! Hope you like it!


Let me know what you think.
Thursday, February 18, 2010
Big Shirt to cute fit shirt
My dad Cleaned out his closet and he had a bunch of old new shirts so I thought I would take them and turn them into something I would wear.
First you will need:
Two shirts or one shirt and matching fabric
Sewing machine
Scissors

First you will need to cut off the top and sides of the shirt (Making sure it will fit you) but don't cut anything off that you want to be on the shirt. (Also you need to make sure to be aware of what is on the back.)

Then cut the hem off where you want the second color/ shirt to be the bottom color.
Cut the second shirts bottom off in the length you desire to be the hem color. Make sure to allow about 1/4 in for seam allowance. (If you are using fabric instead of another shirt you will need to make a hem on one side and allow 1/2 in for your new hem and seam allowance on the other side)
Sew on the second color to the bottom.

Then you need to sew a hem in the second color and attach it to the top of the shirt. (Making a tube top)
(If you want the tube top then you are done) If not you can go on to add straps. For those you will want to make straps out of whatever material you want, hem both sides and sew them on to the shirt. Hope you liked it!

I found that both cloths should be elastic like and stretchy otherwise they wont fit or sew together right. Thank you!
Thursday, February 11, 2010
Recycled T Shirt Tote
Today I am going to show you how to make a recycled T shirt tote bag.
This project was very quick and easy!
Sewing Machine
Scissors
First you will cut two squares or rectangles out of each fabric or the same if you choose.

Then you will need to hem the top of the liner so there are no raw edges.
Complete sewing this by sewing the other side and the bottom together. You will have an inside out bag.

Sew the outside fabric to the inside ( I folded mine right side out first so it was smaller and would for sure fit inside) I also left a little of the raw black edge showing over the top to spice it up a little.


This project was very quick and easy!
You will need:
T shirts or Fabric (Varying in color 1 is for liner and other is for the out side)Sewing Machine
Scissors
First you will cut two squares or rectangles out of each fabric or the same if you choose.

(I only figure the one pic was necessary)
Second you will need to sew one side of the liner together with right sides facing eachother.Then you will need to hem the top of the liner so there are no raw edges.

Complete sewing this by sewing the other side and the bottom together. You will have an inside out bag.

Sew the outside fabric to the inside ( I folded mine right side out first so it was smaller and would for sure fit inside) I also left a little of the raw black edge showing over the top to spice it up a little.

Now you will take the hem of the T shirt and cut it in half or to the length desired for the straps.


Make sure to get as close to the seam as possible. (You may have to go over it a few times) Then sew the straps to the inside of your bag.

Then you are done unless you want to add any embellishments, in this picture I set a flower I crocheted on top to show how it would look.


If you have any questions please don't hesitate to ask!
Tuesday, February 9, 2010
Recycled T Shirt/ Fabric Rug
Today I will be showing you how to make a recycled fabric rug.
You will need:
Sewing Machine
Fabric
First you will cut your fabric into approximately 2in wide 5in long. (The messier you want it to look make strips different lengths and widths)

Second you will need to cut a piece of fabric into the size and shape you want your rug to become. Then Hem it so there is no rough edges.

Then start sewing in lines. (I alternated fabric like doing a checker board)


Let me know how you like it.
You will need:
Sewing Machine
Fabric
First you will cut your fabric into approximately 2in wide 5in long. (The messier you want it to look make strips different lengths and widths)

Second you will need to cut a piece of fabric into the size and shape you want your rug to become. Then Hem it so there is no rough edges.

Then start sewing in lines. (I alternated fabric like doing a checker board)

Sorry the picture is kind of bad.
Keep sewing like this until you reach the end. And your finished product should look something like this:

Here is a closer picture:

Let me know how you like it.
Saturday, February 6, 2010
Sock Monkey
Today I decided to do someone elses tutorial. I found this sock monkey at www.craftbits.com/project/sock-monkey and it was my first sock monkey to make but it was a lot of fun! (If you have any questions feel free to ask!)
You will need:
A pair of socks
Sewing Machine
Needle
2 Buttons
Here is my sock monkey:

You will need:
A pair of socks
Sewing Machine
Needle
2 Buttons
Here is my sock monkey:

Friday, February 5, 2010
Inspirations
Today I am finishing my waste basket so I will not be doing a tutorial. I am going to post some inspirational pictures from my honeymoon.


Thursday, February 4, 2010
Magazine Trash Can
Today I am going to show you my steps to making this magazine wastebasket I found here: http://www.apartmenttherapy.com/sf/look/look-recycled-magazine-wastebasket-050277
It was also in The Big Ass Book Of Crafts.
First of all you will need
Magazines
Glue
Hot Glue Gun
Something Round
The first step is to cut several 2in strips from the pages ( cutting the pages the long way)
 Then you need to fold the strips starting at one end fold over a piece about 1/2in long and keep folding. Then on the last fold you will want to glue it so it is secure.

When you have several strips you will start rolling them, and keep gluing the strip you are adding each time.


And keep going...

Go until you have reached your desired size of the bottom.
You will then need to use your round object to create the sides. I am using a round foundation bottle. You need to take your strip and glue it togeter creating an open circle


After you have your open circles created you will need to start hot gluing them to the base so that they sit evenly with the bottom. (I could not get a good pic of this)
Then you keep adding circles until you get to the desired height. Mine is not finished yet but when I am finished I will add more pictures.
Placing should be between previous circles


It was also in The Big Ass Book Of Crafts.
First of all you will need
Magazines
Glue
Hot Glue Gun
Something Round
The first step is to cut several 2in strips from the pages ( cutting the pages the long way)


When you have several strips you will start rolling them, and keep gluing the strip you are adding each time.


And keep going...

Go until you have reached your desired size of the bottom.
You will then need to use your round object to create the sides. I am using a round foundation bottle. You need to take your strip and glue it togeter creating an open circle


After you have your open circles created you will need to start hot gluing them to the base so that they sit evenly with the bottom. (I could not get a good pic of this)
Then you keep adding circles until you get to the desired height. Mine is not finished yet but when I am finished I will add more pictures.
Placing should be between previous circles


looking from the top down

Subscribe to:
Posts (Atom)